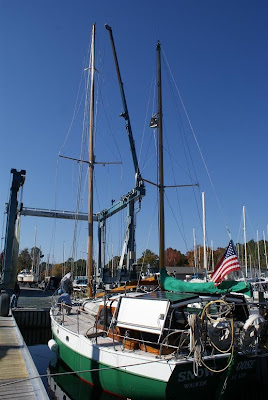
Tuesday, November 23, 2010

Long days on the intercoastal

The way south is either off shore or in the “ditch” as cruisers call it. Offshore is an option but it helps if you have a good weather window or be a “hairy chested seaman” which I’m not. When we got to the Atlantic Ocean at Morehead city, the winds were from the SW, right on the nose, so we opted to go down the ditch. Here’s the chart of Morehead to give you an idea of what we have to deal with.

There is both good and bad things about the ditch. It is very protected and does run pretty much in the right direction and there is plenty to see as you go by at your leisurely pace (6 MPH). The negative is bridges. Some open on the hour some on the half hour and you inevitably get there just as they are closing the bridge so you wait and wait. Here we had to wait more than 15 minutes so we have dropped an anchor and shut the engine off while we waited.

Another item is the tides. You folks up is the great Lakes are blessed with both fresh water and no tides! The tides can be a blessing or a curse. While sitting at anchor in front of a bridge we had 1 ½ knots of tide going in our favor. One mile later we passed the inlet to the ocean and on the other side of the inlet the tide was going 1 ½ knots against us. We went from 7+ over the ground down to 4+ over the ground. It was like slamming on the breaks. Sometimes, it can be so boring that you just can’t stand it but most of the time there is something interesting to see waiting just around the next bend such as a junk boat or a container ship!


Also there’s the multimillion dollar houses that line the waterway. Anna decided that this is the one that she is going to buy.

The area that we are in now is cut through cypress forest and swamps and is very beautiful.


The weather is going to stay against us until Friday then we might get a chance to go offshore and with a little luck we could skip the marshes of Georgia and jump right to Florida.

Thursday, November 18, 2010

Mast rebuild 10

The last day. Up early to install the last little bits of stuff and the roller furlers to the mast. Then it was time to roll the mast out to the boat and pick it up with the crane.


We had a bit of a hard time getting it to line up properly and we had to stop to put a bit of vaseline in the hole but after a few tries it went in nice and straight (sounds kind of kinky) and then we had a mast again!


The rest of the day was spent getting the rigging hooked up and the mast tuned. We should be leaving for the coast tomorrow and it looks like we’ll sail down the coast for the next few days. Thanks for reading this I hope that you enjoyed it.

Wednesday, November 17, 2010

Mast rebuild 9

The final day of work. I started out installing the mast steps and the roller furler deflection pulley at the top of the mast. These are really helpful when you’re at the top of the mast in a boson chair and need to get that extra 24 inches higher to work on the light or the wind vane.

I also installed the mast track and the jumper strut collar that the jumper struts mount into on the mast and then the struts and their wires.


After that I mounted the spreaders and also the rest of the standing rigging. Tomorrow, we hook on the roller furlers and the 2 halyards then the mast is ready to go up.

Monday, November 15, 2010

Mast rebuild 8

OK, I know, this is getting boring but it will soon be over . Yesterday I “dry” fitted the hardware and today I permanently installed it by putting black caulking under everything and screwing, nailing or bolting it into place. I use copper sheet as a protector between the mast hardware and the wood. It was a slow messy process to nail the sheets into place.


Then I applied another coat of varnish. While the varnish dried, I installed the tri-color light at the top of the mast and pulled the wires for the new wind vane. I had to solder the old and new wires together to insure that they wouldn't break apart while I pull the wire through the 50+ foot of mast.


Tomorrow, if it doesn't rain I hope to finish the mast.

Sunday, November 14, 2010

Mast rebuild 7

Another day of mast building but the end is in sight. Today I finished "dry" installing the hardware at the top of the mast and also fit the rest of the hardware on to the mast. (This is where everything is fit but not put into place permanently).


Afterwards, I put the first coat of varnish on the mast!!! YEA! As soon as we have 4 coats of varnish the mast can be put back up and we will head out of here.
While the varnish dried, I also rebuilt the destroyed roller furler and we picked up the new anchor & chain. Soon we will be a cruising boat again.

Saturday, November 13, 2010

Mast rebuild 6

It’s done! Well, the major rebuilding is done now to install all of the hardware. First is the top of the mast where the straps that the rigging attaches to and the sheave box rests. This is very “fussy” woodwork for the straps must fight perfectly to handle the pressures that the rig will put on the mast and the sheave box must be put right through the top of the mast, another difficult thing to do. I started by marking a rough outline where the strapping should go.

Then I slowly cut the wood back until the straps fight tightly.


Then I drilled a series of holes through the mast and slowly chiseled the wood out until the sheave box fit snugly into the mast.


It doesn’t look like much but it took an entire 8 hour day to do this work.

Mast rebuild 5

Today was a hard day, I shaped the mast. It went from a long hollow box covered with glue to a tapered oval all done by eye. I started off by using the power plane to cut the excess material away until I had a even sided cleaned up box. Then I made centerline marks on all 4 sides.


Now comes the hard part, take everything away that shouldn’t be there and leave just the mast. First you use the electric plane, then the hand plane, then the sander and finally hand sand it. A labor intensive job that took about 5 hours.


After that I repaired a couple of knots that were in the wood and gave the mast a coat of penetrating epoxy and added the final shims at the top of the mast.


The joints came out pretty good (for working on saw horses behind a building) and the mast is really “shaping” up nice!


Friday, November 12, 2010

Mast rebuild 4

While the glue is hardening I made the new jumper struts for the top of the mast. The old ones were broken when the top came down.

To make a pair of new ones, I traced the old one onto some scrap wood and then cut out a matching pair of blanks. A bit of shaping, sanding and fitting the metal ends on and it is beginning to look like jumper struts again.


The last thing to do is reinstall the end plates. These had to be rabbited into the end of the strut and through bolted into place. A bit of final sanding and the end plates will be ready to come back off to be glued permenetly into place.


When the epoxy cures, all they will need is a final hand sanding and several coats of varnish. Of course, I will need a finished mast to install them to!


A lot of work for two small items.